Monday 29 February 2016

another kraft paper flower

and yet another kraft paper flower tutorial.

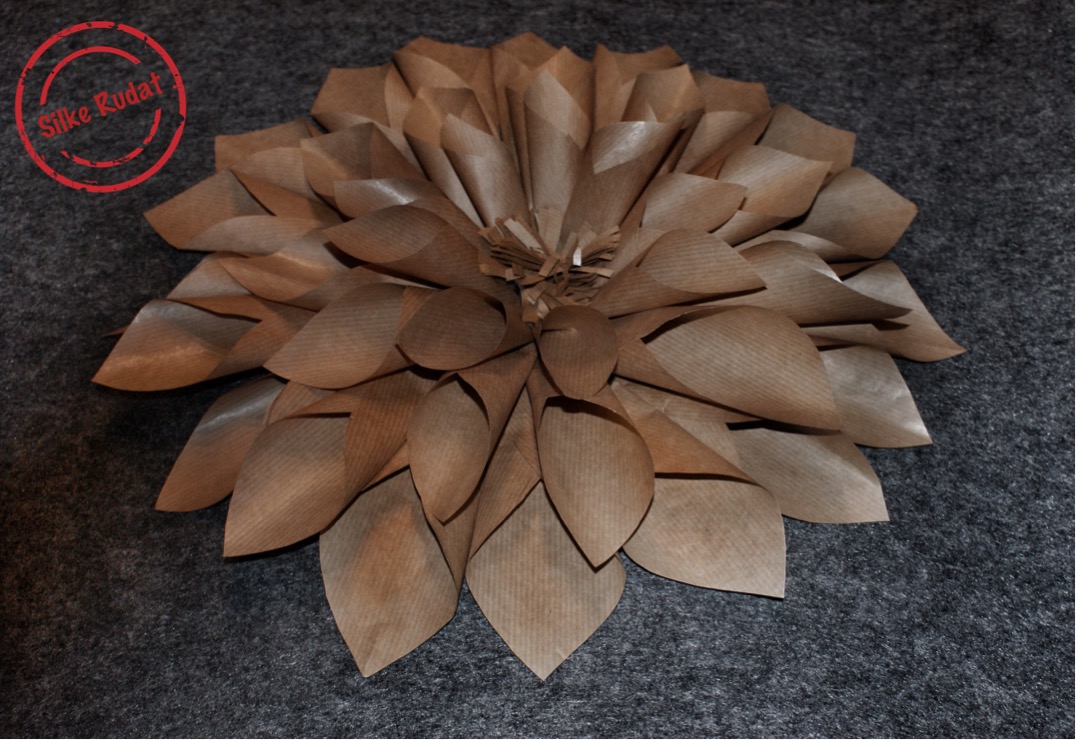
again this one is quite simple, but yet beautiful...it could be easily done without a template but as esther from deko kitchen was kind enough to create one and to publish it, why not using it.

for the purpose of making giant paper flowers , i just had to resize the flower but just adding a few more larger petals.


the tutorials for the other paper flowers can be found here:


http://silkerudat.blogspot.de/2016/03/giant-paper-flower-wall-backdrop.html


this is what you need


- kraft paper roll

- pencil

- eraser (just in case)

- scissors

- glue stick

- template

- gem stone (optional)


this is what you have to do


 - place the templates on the kraft paper


- draw the outlines of the petals onto the kraft paper


- cut out the petals


- you should have a variety of different sized petals


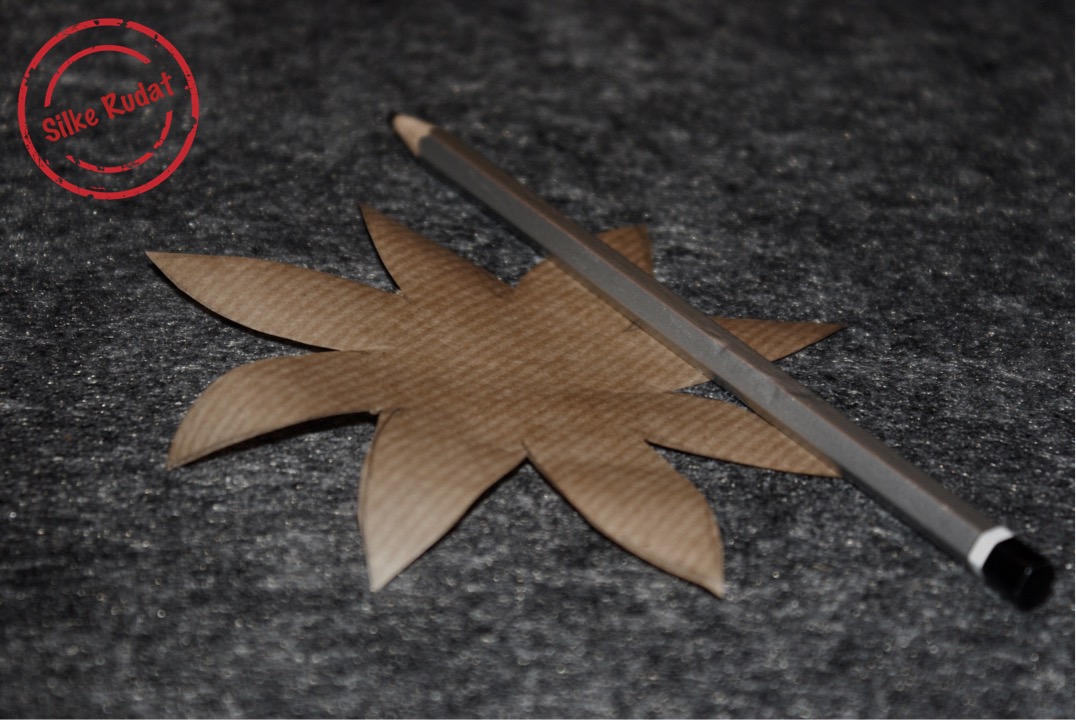
- get your pencil ready


- place the pencil in the middle of each single petal to slightly shape the petals


- the petals should be slightly folded inwards


- you could simple fold the petals in the middle to create a similiar shape


- apply glue onto the centre of the largest petals


- firmly press the smaller sized petal onto the glue 


- repeat with the remaining petals


- and that's it

- a gem stone could be added to the centre of the flower 


i hope you enjoyed the tutorial...thank you very much for your interest...best regards...silk
e


Thursday 25 February 2016

more and more giant kraft paper flower

halfway there...paper flower number four and a few more to come.

i can't wait to get this flower wall done...i mean, i made one already but did not find the time to take pictures and to write the tutorial...i was actually producing paper flowers.

the flowers were meant to decorate my parents place, while i was celebrating my birthday with good old friend...but this time the paper flowers should decorate my own place and i think the kraft paper flowers will look great on my living room wall, which happens to be painted in a very similiar colour.

as soon as i am done with the flower and as soon as i find a way to stick them onto my wall, i'll let you know.

until then, i'll keep on posting the tutorials of the flowers, i am making.


this is what you need


- kraft paper (dinA 4 size)

- pencil

- eraser

- scissors

- glue stick

- glue

- template


 this is what you have to do


- get one sheet of kraft paper ready


- fold into half lengthswise


- fold into half one more time


-draw the petal according to the template


- apply some glue onto the lower left side of the petal


- fold the left side over and press carefully onto the right side of the paper 


- the petal should look like a cone


- repeat with as many cones as you need, i used about twenty-five of them


- cut out a medium sized circle


- glue the first cone onto the outer edge of the circle


- continue gluing cones along the egde


- keep on adding cones until the entire circle is covered


- get your glue ready


- apply some glue into the centre of the circle


- place some more cones in the centre of the circle


- it could look like this 


- apply some more glue


- you might have to shorten the cones for the inner circle


- glue them into the inner circle


- let everything dry


- get a larger strip of kraft paper ready


- fold the paper strip into half


 - cut some fringes into the paper strip


 - furl the fringed paper strip 


- apply some glue onto the outer end of the paper roll


 - press the end firmly onto the roll


- pull the fringes apart


- apply glue on top the last layer of the paper cones


- press the fringes paper roll firmly into the centre


- here we go


two more flowers are in progress and the tutorials will follow soon.

thank you very much for stopping by...best reagrds...silke


Thursday 18 February 2016

even more giant kraft paper flowers

...and again some more giant kraft paper flowers...building a flower backdrop does require a  variety of different flowers in various shapes and sizes...and i am still exciting about creating new ones.

for this type of flower, you do neither need templates nor a talent for drawing...believe i am not blessed with any drawing talent and i could managed very well.

...they are really quick and easy to make...i am delighted.


this is what you need


- roll of kraft paper

- pencil

- eraser (just in case)

- scissors

- glue stick

- gem stone (optional)


this is what you have to do


- lay the kraft paper roll flat on your table and get your pencil and eraser ready


- draw a big flower onto the kraft paper


- add more flowers in different size


- cut out all flowers


- amount and sizes of the flowers can vary


- get your scissors ready


- curl the edges of the paper petals by pulling them over the blade of the open scissors


- the curled petals could look like this


- arrange the petals in order of size


- adhere the smallest petal on top of the second smallest petal, by applying some glue in the middle of the larger one


- continue with the remaining petals


- at the end you can add a gem stone in the middle of the flower


- the flower could look like this

step by step the flower backdrop grows and younare more than welcome to have a look at the other flowers right here.

thank you so much for your visit and very best regards until next time...silke