Wednesday 30 July 2014

notebooks made from vinyl flooring

i am not really sure if these vinyl flooring samples are usually for sale...i found them in a hardware store which closed down and just asked if i could get them...and i could.

...not having any clue what to do with the samples, i was still very happy to have them in my craft stock.

as i just love to make really useful stuff...i decided to make some notebooks...journals, photo albums, guest books, notepads, shopping lists, address books, birthday calendars and even advent calendars...this is what they are also good for.

...the material is surprisingly were easy to handle...no big deal to cut or to punch it...and even though i haven't tried, i think it is quite easy to sew with your sewing machine, too.

due to the faux wood look they do make very nice gifts for men, but are also a great for women, who are not that into all that bling-bling or just want to have a change...

they are so quick and easy to make and as i made some advent calendars last year already, you can find the full pictured tutorial right here:


i hope you enjoy the tutorial as much as i did...thanks a lot for stopping by...best regards...silke


 this is what vinyl flooring samples look like..just in case you have no idea what i am writing about.


Wednesday 23 July 2014

lady of the rings

i recently rediscovered my fancy ring collection and decided they are worth to be shown off as well.

pipe isolation and a picture frame...i thought this could work...and luckily it did.

my backup plan to use painting rolls was in place, but only remained to be my plan b, which did not come into use.


this is what you need


- picture frame

- foam pipe insulation

- glue (double sided tape, if you intend to reuse your picture frame), hot glue if not

- craft knife

- scissors


this is what you have to do


- cut your foam pipe isolation in the length of your picture frame


- cut the foam lengthwise along the seam

- make another cut on the opposite side to divide the foam into two halves


- cut four pieces of the double-sided adhesive tape


- place the sticky part of the tape along the cutting edge

- peel off the backing paper


- adhere the first half of the foam pipe into fhe picture frame


- repeat with the second one


- use your craft knife to cut small notches into the centre of the foam pipes


- place your rings into the notches


that's it...you do have a beautiful solution to present and stow your rings.

I hope you enjoyed my tutorial...best regards...silke


Thursday 17 July 2014

poptails: cocktail popsicles

do you know how it is...there is this project you want to do since ages...and when you finally get the chance to beginn with this project, you are so excited...and...you screw it all up.

this is what happened to me...poptails, such a beautiful idea...boozy or virgin...i needed to make some...i guess since about two years by now...finally i got all the ingredients, a variety of popsicle molds and the time...i started washing, chopping, pouring, mixing, blending and pouring again.

...the only thing, i needed to do was the freezing part...omg...not enough space in my freezer...damn...it did not see that one coming.

...holding my popsicles molds in one hand and trying to rearrange my freezer drawers with the other hand, without accidently defrosting my freezer...quite challenging.

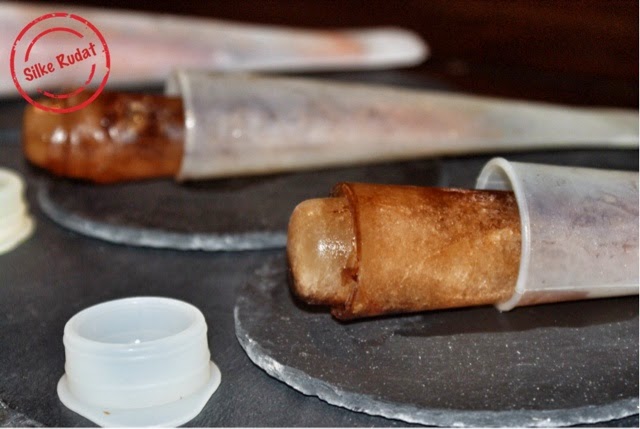
the results are not the best...but they taste so much better than they look...and the idea is still great.


if you are more into the virgin version of the cocktails, you can easily just leave out the alcohol or replace it with ginger ale or soda water.


mojito popsicles


this is what  you need


- 2 cups mint leaves
- 3/4 cup fresh lime juice
- 1 cup water
- 3/4 cup brown sugar
- 1/3 cup cachaça

this is what you have to do


- place all ingredients into your blender
- blend until smooth
- pour into popsicles molds
- freeze overnight


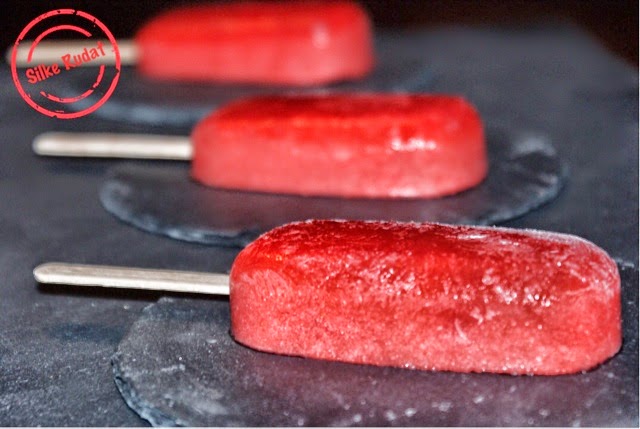
strawberry daiquiri popsicles


this is what you need


- 2 cups hulled strawberry
- 1/2 cup rum
- 1 lime, juiced
- 1/4 cup agave sirup

this is what you have to do


- place all ingredients into your blender
- blend until smooth
- pour into popsicles molds
- freeze overnight


pina colada popsicles


this is what you need


- 1 1/2 cups finely diced fresh pineapples
- 3/4 cups coconut cream
- 1 lime, juiced
- 1 tablespoon sugar
- 1/4 cup rum
- handful of coconut flakes (optional)

this is what you have to do


- place pineapple, coconut milk, coconut flakes, lime juice and sugar into your blender
- blend until smooth
- add rum
- mix until well combined
- pour into popsicle molds
- freeze overnight


cuba libre popsicles


this is what you need


- 2 cups coke
- 1 cup rum
- 2 lime zests
- 1 lime, juiced

this is what you need


- shake your coke well and let it sit
- place all ingredients into your blender
- blend until smooth
- pour into popsicles molds
- freeze overnight


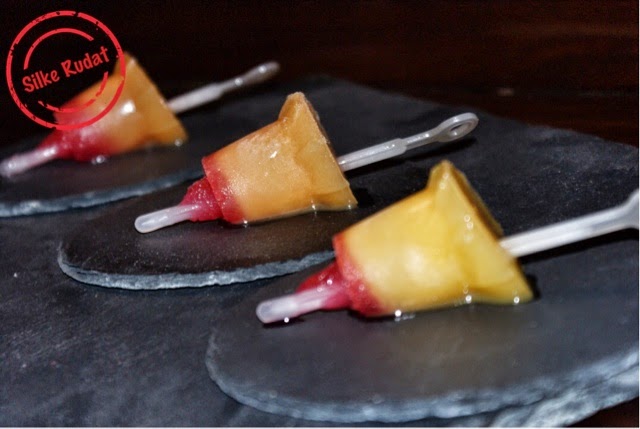
tequila sunrise popsicles


this is what you need


- 1 tablespoon grenadine
- 2 tablespoon lime juice
- 2 teaspoons honey
- 1/2 cup orange juice
- 1/4 cup tequila

this what you have to do


- combine grenadine, lime juice and honey
- pour the grenadine mixture into the popsicle molds
- freeze for one hour or until firm
- combine orange juice and tequila
- carefully pour the orange juice mixture over the frozen grenadine mixture
- insert the popsicle sticks
- freeze overnight


i hope you enjoy your boozy popsicles...they will be great for any garden party and barbecue or just for yourself, enjoying a great summer night...warmest regards...silke


Monday 7 July 2014

chalkboard hoops

embroidery hoops...they are just asking for wall art craft...i do prefer craft you can actually make use of and not just being beautiful and the only thing you can do with than looking at it.

...a memoboard would make sense...but it had to be different to all the memoboards, i already made.

so what about a chalkboard...i did like the idea and while looking for chalk cloth fabric, i figured out that i am by far not the only one, thinking of that.

anyways, i made my chalkboard hoops and show you are easy they are to make.


this is what you need


- embroidery hoops

- chalkboard cloths

- hot glue gun

- metallic paint

- brush

- scissors

- screwdriver

- paperclips

- chalk pen

- sponge


this is what you have to do


- get your embroidery hoops and your paint ready


- paint the outer ring of the frame


- cut your fabric to cover the hoop


- it should be slighter larger than your hoop


- place the chalkboard cloth onto the outer hoop, right side facing the hoop


- place the inner ring of the hoop into the center of the outer ring, facing the wrong side


- push the inner ring firmly into the outer ring


- pull the chalkboard cloth taut and tighten it

- there should not be any wrinkles


- thighten the metal screw of the tightening device


- cut off the excess fabric


- leave a border of about 0,5 inch


- fold back the remaining access fabric 


- hot glue in onto the inner ring


- that's it


- label your chalkboard with a chalkpen


- add a fancy sponge and your chalkpen onto your chalkboard hoops using large paperclips


thank you so much for stopping by and for being interested in my tutorial, which i hope you have enjoyed...warmest regards...silke